
Design In Blender Print On An Ender: Easy To Read Visual Programming For The Purpose Of 3D Printing
I made a series of neat discoveries,
and so as long as I keep it short, I think it is OK to share my most fanciful one.
Though I want to give an honorable mention to the runner up,
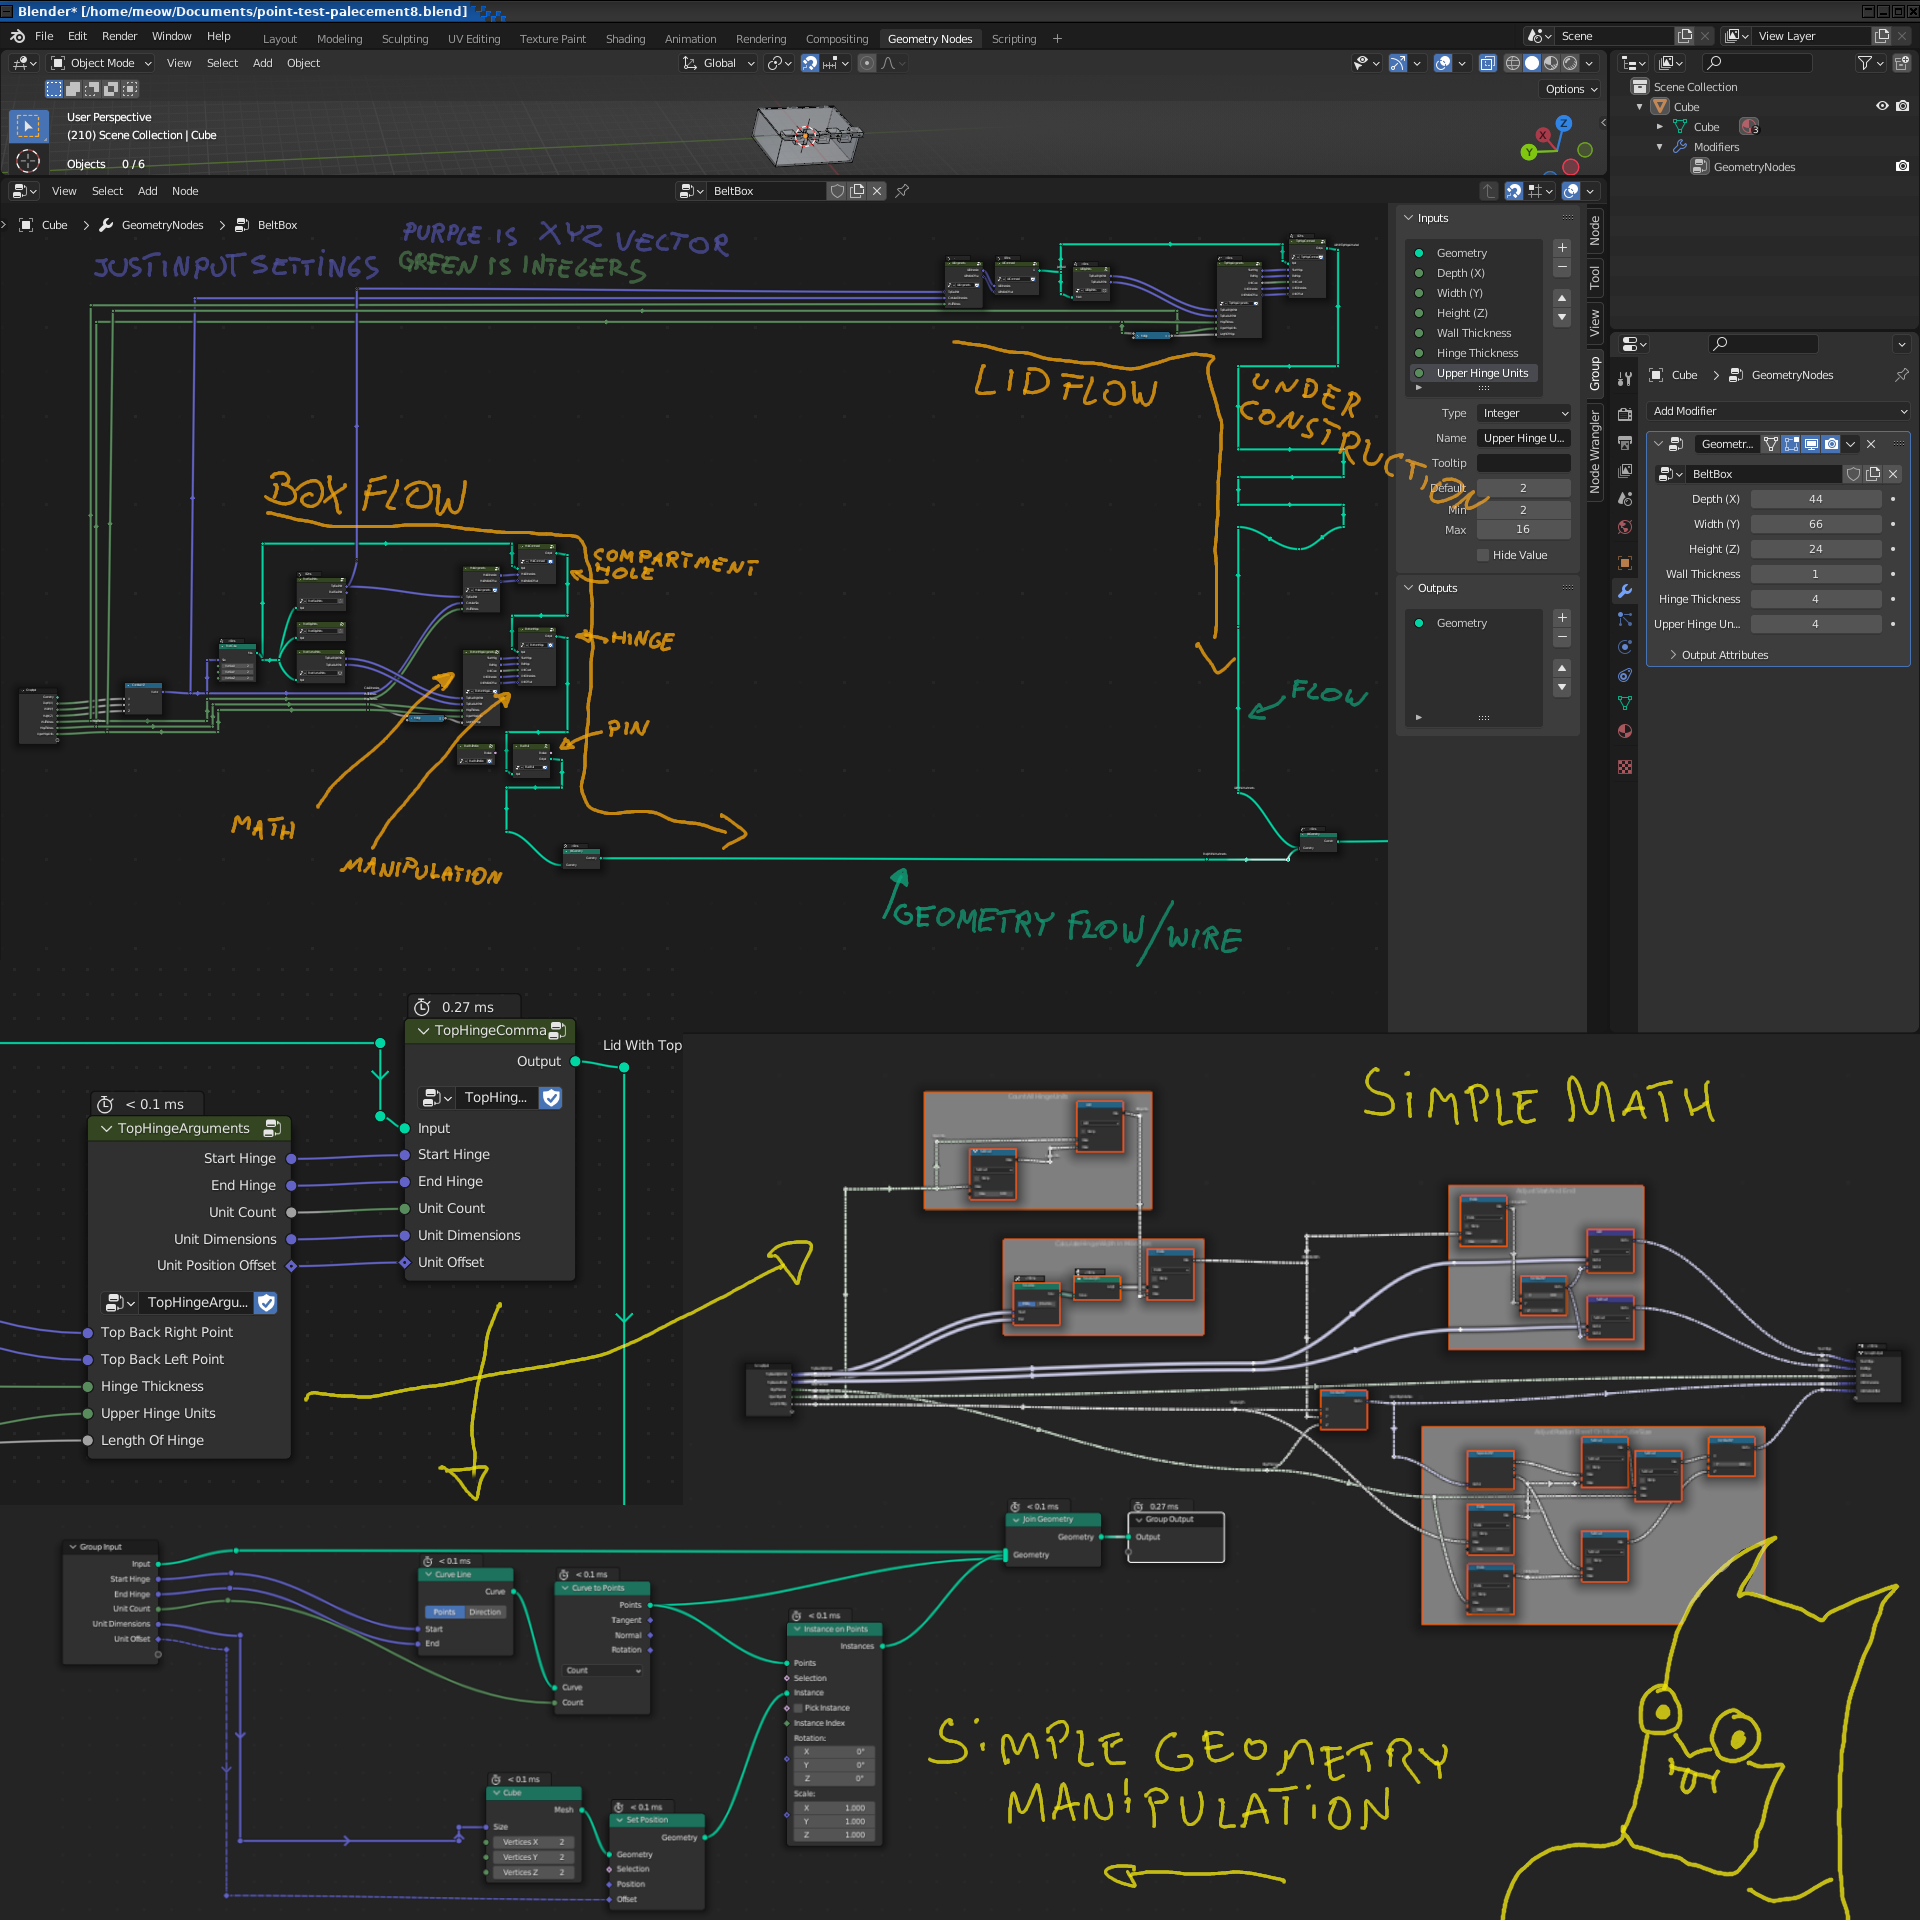
my second best idea is to keep Math Configuration and Geometry Manipulation apart.
Preferably by creating two components or groups with well defined properties,
first group would contain the bit of math that is always needed to get things right.
And the second group, the object or property manipulations,
that influence the actual geometry.
This way no matter how confusing or messy you math,
you are still reducing it to just a handful of output properties.
Which always tend to add up to the a solute minimum of values,
necessary to get your geometry setup in the geometry manipulation group.
It is about dividing design complexity,
to tame it down and keep things simple and easy to manage.
Both in mind,
and in software.
It requires,
that you work your way back from the print surface of your 3D printer.
“How many objects are there in your creation,
that will require assembly after the print is complete?”
Because those separate pieces of plastic,
represent the geometric primitives you must first create in your program.
Those primitives,
are the starting point.
Because to tame the complexity down,
what you are going to do...
Is start with the primitive,
and decorate around it.
You are starting with the primitive that gets the decorations,
that makes the piece of plastic, that you later on have to assemble a bit.
Thinking like this works really well for creating kits,
that can be configures in various ways.
The word decoration here is very important,
because that means that all you are doing.
Is sending the geometry of your initial primitive,
down a single stream or wire.
Since the end result is a singe stand alone piece of plastic,
it means that stream of geometric information does not combine with anything.
All you are doing is applying decorations,
or more precisely geometric transformations.
For example, there are numerous things that feature,
in just a singe Superhero Belt Compartment.
The cube primitive, the lid, the lid hinge, a handle to easily lift the hinge,
a tidy locking mechanism to click the lid in place.
Then you have the lower hinge, belt loops in the back,
little feet because you can make a jewelry box out of it.
There are also slide rails on the side to allow mini accessories,
one of which maybe a connector that an make a belt just out of the compartments.
Then there are decorations for the front,
some kind of an easy to print motif that looks fierce regardless how tall the compartment is.
There is the hole for the pin that connects the upper and lower hinge together,
the hole will need room to inset the pin head.
And the pin should have a tactical looking head,
and allow for easy disassembly.
All of these little bits must be programmed in such a way,
as to make for an easy to follow visual programming program.
That you can debug and improve,
and this easily understand.
Let us take a look at a simpler variation,
where we only have the box and the lid, a pin, matching hinges, and a hole in the hinges.
When you visualize it on your 3D platter,
it is only 3 things, the main compartment, a lid, and a pin to hold the two together.
That means you can start with a cube for the compartment, a flat cube for the lid,
and a thin cylinder for the pin, three things... box, lid, and pin.
See the compartment hole where you put things,
both the upper and lower hinge, the hole within them, are just decorations that you apply to the primitives.
One,
The main compartment cube gets decorated with a compartment hole,
a lower hinge, and a hole through the hinge.
Two,
The lid, gets decorated with a matching hinge,
and again a hole through the hinge.
Three,
Is your pin,
which in its simplest form is an undercorated cylinder primitive.
For those of you who are wondering about the holes for the pin,
those are also a cylinders, ever so slightly larger than the pin to make for a good friction fit.
But hole cylinders use Boo lean geometry,
they are subtracted from the hinge.
In closing, I would like to explain,
that this decoration flow, or process calls for two separate hole cylinders.
One to subtract a hole in the lid hinge,
and one to subtract a hole in the hinge of the main compartment.
Here, we are creating a separate line of decorations,
one for the lid, one for the compartment.
This creates a single easy to comprehend line of decorations,
reusable components are fine, but they must be instantiated separately.
One fancy inset pin hole for the upper lid,
and one fancy pin hole for the lower lid.
It is very important that the decoration process is one long line,
this way a year after you make your creation...
You will still be able to understand the decoration process,
and easily add ore remove decorators.
And to help you remember it better, here it is in a singe sentence:
"Don't Cross The Streams"